My last post about the coop construction came as we had finished getting the exterior shell on the coop and it looked something like this:
Given that it now looks more like this:
and given that the chicks have been living in it for a week now, it would be reasonable to conclude that quite a lot of steps in construction took place between then and now. And not only reasonable, but correct!
The next step after getting the external plywood shell up was to start work on the run. I wanted to try to plant some grass in the run and give it as much time as possible to get established before moving the girls out. But there would be no point in planting grass until we were done trampling it all the time. So we began work on the run.
Initially, I had imagined a run simply framed and attached to the coop, with structural members resting on the ground. But the more I thought about contending with the slope of the yard and structural integrity, the more I thought it would be a good idea to sink some 4x4 posts as the basis for the run. So off Max and I went to Lowes for cedar posts and bags of concrete. He was a tremendous help (have you ever tried to lift a 60 lb. bag of Quik-Crete? Gives new meaning to the idea of "dead weight"). I used cedar everywhere the wood touches the ground. I will not use "pressure" treated wood because of the toxicity of the chemicals that are actually used to treat it. And cedar, which has some natural resistance to rot, is too expensive to use everywhere. So I compromised.
We dug five holes, mixed five wheelbarrows full of concrete and sunk five posts, creating a run footprint that is 6x12 and an opening for a human-sized gate to come and go from the run.
 |
| concrete footing |
 |
| runhenge: the bones of the run |
While letting the concrete set (and with Hank away in the evenings librarianing) I turned my attention to the floor of the coop, which I could work on solo. When we initially put the plywood down on the floor, we avoided extending it out to the outer shell, which would have required notching it around all the studs. But that left us with a gap between the exterior shell and what would eventually be the interior walls. I decided to lay 1-inch pine boards over the plywood, this time notching around the studs to fill in that gap. I'd had it in mind for a long time to try that technique for a floor. It seemed like a very cost-effective and efficient way to get a rustic-looking wood floor. I was thinking of employing it in my imagined garage-conversion-writing-cottage but the coop gave an opportunity to try it out on a smaller and less committal scale. The result was rather lovely:

But there are a couple problems. First, unless you can find boards that are perfectly straight and flat, there will be slight gaps between the boards and some will torque one way or another. I nailed mine down and some of the nails didn't want to stay put perfectly, causing a little roughness. Still, with careful wood selection and perhaps a different nail type (or even screws) and a little sanding, it seems to me this might be a viable option, even in a living space.
Floor in place, we turned our attention to insulation. Because we had placed the rafters on their sides rather than on end, there was not much of a gap for insulation between the rafters. So instead we used a reflective bubble wrap, tacked to the rafters:
 |
| and note the hurricane strap--yes, we are survivors of Hurricane Andrew... |
For the walls, fiberglass batts:
 |
| fiberglass: gloves, long sleeves, eye protection--and still itchy! |
Then, back to the run, where cross-beams went up:
and more cross-beams, now with hardware cloth tacked up to a height of more than 6 feet all around:

I will digress here to note here that fairly early in the building process, I became most impatient with Hank's hammering style and pretty much insisted on doing all the hammering myself. It may seem absurd to haggle over hammering style, but when there are hundreds of nails being driven, such a thing begins to grate. Of course, having assumed all responsibility for hammering, I felt honor bound to do so in an exemplary fashion. And, friendly competition being what it is, I would be lying if I didn't confess to a little pride in my hammering prowess. Which led Hank, in an inspired moment, to call me (entirely without irony, I'm sure): The Nail Whisperer. It is true that as I worked a particularly difficult nail (in a corner, into a hard piece of heartwood, rehabilitating one that threatened to bend through, ahem, no fault of mine) I began to think of pounding nails as a kind of Zen exercise. Or even as a version of drawing a particular sound out of the fiddle. Pounding nails requires a focus on the feel of the hammer, the feel of the nail and the way it responds to the hammer--in exactly the same manner one must feel the bow in one's hand and feel the way the string responds to the bow. Apologies to Simon and Garfunkel, it requires being both the hammer and the nail. And even more challenging than nails are staples! The staple gun we used to tack up the hardware cloth and the insulation was often no match for the harder pieces of wood and staples would be left only halfway in. Tapping them in carelessly leads to them simply crumpling and not actually going any deeper. But with some very sensitive hammering, it is entirely possible to drive a reluctant staple all the way in. It's tricky, but I will admit it is also pretty damn satisfying. Now back to our story...
And then, with a series of beams across the top, a cover of traditional chicken-wire to keep out the aerial predators:
The (conspicuously absent) gate will have to wait for another post. You can see that already the grass was starting to emerge and look like the beginnings of a carpet!
Then, with all the insulation in place, ceiling and walls went up. We had a little debate about the material. I was expecting to use drywall, which is cheap, easy to work with but a pain to transport with the Subaru. But Hank has a thing about drywall and its off-gassing so he prodded me to consider something else. We looked at faux bead-board but that also had a horrible smell and seemed flimsy. After weighing the options, we ended up with a very lightweight plywood, which was relatively easy to transport and work with and doesn't seem too off-gassy.
 |
| and, before painting, it had a lovely rosy glow |
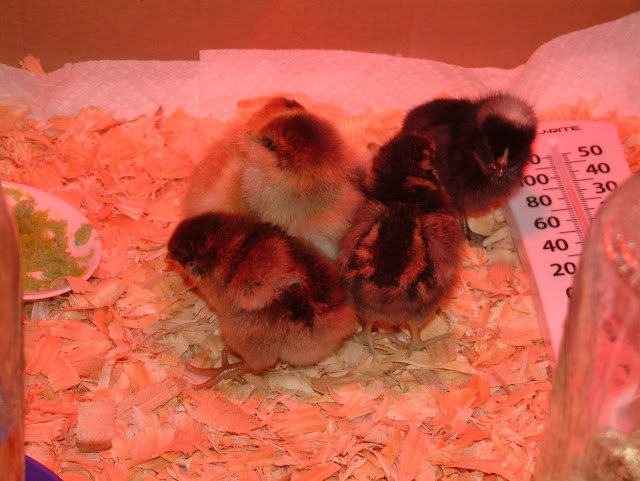
There was still lots more to be done and the girls were 12 days old at that point, getting bigger...
 |
| actually 10 days old, and terminally blurry, as always... |
The race was on: would we finish the coop before they completely outgrew their brooder?!? Tune in next time, when all will be revealed...


